Monday, November 9, 2020

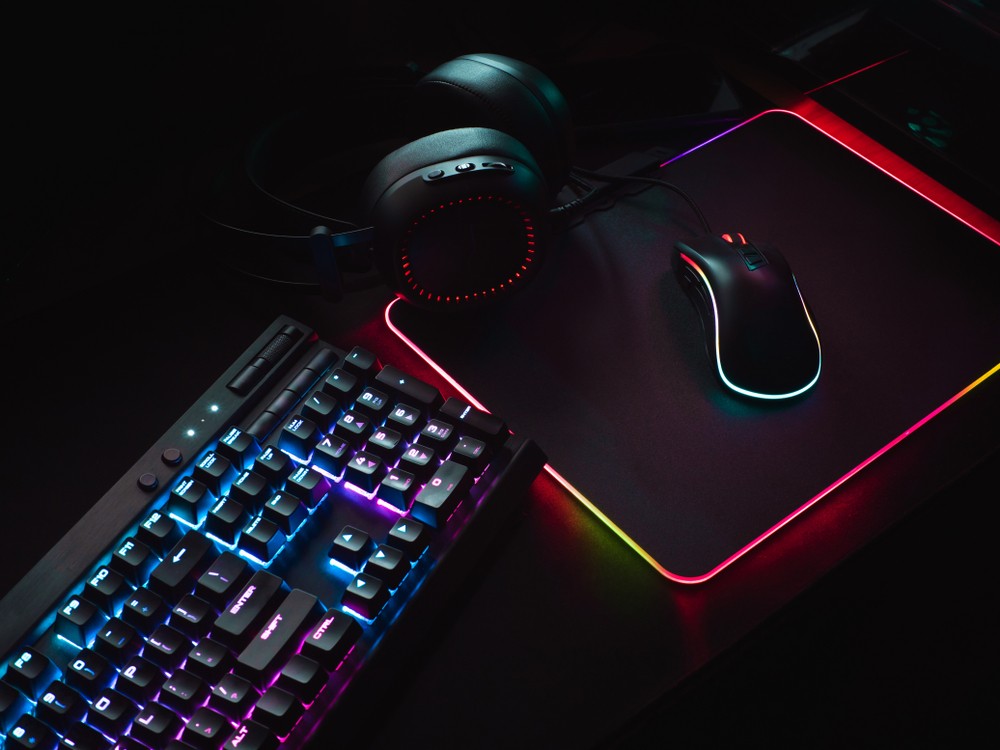
How To Clean a Gaming Keyboard – A Step-by-Step Guide

Of all your gaming PC’s components, the keyboard must be the hardiest. Think about it: your fingers are always pressed against the keys, crumbs from your snacks and spills from your drinks spill on it all the time, and more! 

It is a wonder that it keeps going while other components break down, right? What’s more, most people don’t see the need to clean their keyboards until the dirt accumulates. This is a pity, considering how easy it is to clean a mechanical keyboard. 

A quick wipe usually does it in most cases. In some cases, however, it becomes necessary to bring out the hoses. Whichever your case may be, this guide will help you clean your keyboard like a pro. 

Cleaning Keyboard Dust & Debris – The Quick Version 

A quick wipe usually gets the job done, as mentioned. This is especially recommendable if you are dealing with dust and small debris. Here is a step-by-step guide on how to go about it:

Unplug 

The first step is unplugging the keyboard if it is plugged in. This is necessary to avoid keying in wrong commands or destroying the plug. Besides, you should be cleaning the keyboard at a separate workstation, away from your gaming PC. If you use a wireless keyboard, make sure it is switched off.

Clean 

Cleaning your keyboard will only take a few minutes. You will need a can of compressed air, a soft brush, and a clean towel. Start by turning the keyboard upside down and give it a thorough shake to pour out any trapped debris. 

Next, take the brush and compressed air and use them to dislodge any particles hidden under the keys. Use the brush to reach under the keys and then blow off the dislodged particles using the decompressed air.

Turn the keyboard upside down after each brush to pour out the trapped debris. Finally, dip the soft towel in alcohol or a detergent and use it to wipe off the dust. 

P.S. Be careful when brushing under the keys so as not to detach them or cause any other damages. It is also best to use a low-pressure blower. 

Plug & Test 

It is unlikely that you will damage anything cleaning your keyboard as directed above. However, go ahead and test it – just to be sure. Press every key and check to see that it works as programmed. 

Cleaning Keyboard Grease & Liquids – Going Deeper 

Everyone knows that you shouldn’t spill drinks on your keyboard, but gamers cannot seem to avoid it. Unfortunately, liquids will actually damage your keyboard, unlike dust and dry debris that will only stick around and make pressing the keys difficult. As such, it is important to act quickly, as directed below:

Unplug & Open 

Water is a good conductor of electric current, and there is current flowing all across your keyboard. As such, the first step should be unplugging the keyboard as quickly as you can to avoid extensive damage to its electric components. 

Next, unscrew the bolts and open up the keyboard. Be careful not to snap any wires or misplace any components, as this will essentially render the whole keyboard useless. 

Clean & Dry 

Cleaning grease and liquid is more complex than getting rid of dust and debris. You will need a soft brush, a clean towel, and alcohol – not to mention a pair of steady hands. The alcohol is necessary to help vaporize the liquid droplets on your keyboard, and the brush and clean towel are necessary for applying it. 

As such, dip the brush in alcohol and gently run it over the affected components. Use a towel to gently soak up any liquid remaining. Avoid using the soft towel unless the area you are cleaning doesn’t have multiple components sticking out. Do this repeatedly until you notice all the liquids disappear, and then leave the keyboard open to dry. 

Plug & Test 

Hopefully, the liquid didn’t cause any damages. However, go ahead and plug your keyboard in just to be sure. Press every key on the keyboard and check to see that it works as programmed. Otherwise, consider soliciting a professional or replacing the keyboard. 

Keyboard Restoration – The Deep-Clean Version

You may think of deep-cleaning a keyboard as a deeper combination of the two procedures above. It entails cleaning the keyboard’s surface, much like how you would do it in the first procedure. It also entails opening up the keyboard and cleaning the interior. However, you may not need the alcohol if your keyboard doesn’t show any sign of grease or spilt liquids. 

Deep-cleaning your keyboard will prove to be a delicate affair. As such, get all the tools you need first, including screwdrivers, a soft brush, soft towel, compressed air, and any other accessory that you feel may help.

Additionally, set up a clean and spacious workplace to work from. This will help keep your work organized so that you don’t lose any components or snap any wires by mistake. To this end, it is worth noting that you may need basic technical skills to do all of this without damaging your device. 

When Everything Else Fails… 

Cleaning a keyboard isn’t difficult. However, it is not uncommon to run into complications. In such cases, experts recommend soliciting professional assistance. This shouldn’t be difficult: just unplug your keyboard and take it to the nearest technician in its present condition, and don’t lie about any underlying problems, such as liquid spills. 

Keep It Clean

How often do you clean your keyboard? It is recommendable to clean your keyboard periodically, but this best works as a maintenance measure. It is easier and smarter to keep your keyboard clean – and this is just as easy as it sounds. 

Keeping your keyboard clean begins with ensuring your gaming room’s and gaming PC’s cleanliness – on a related note, exposing your gaming PC to dust and other dirt will reduce its performance and durability!

To this end, it is recommendable to keep your gaming room sealed to prevent dust from coming in. Additionally, avoid bringing food and beverages into your gaming room, and if you must then avoid placing them on your gaming desk.

Use this video for a visual representation of how to clean a gaming keyboard!

The post How To Clean a Gaming Keyboard – A Step-by-Step Guide appeared first on iDapt Web.
Tuesday, November 3, 2020

How to Clean Your Gaming PC – A Simplified Guide

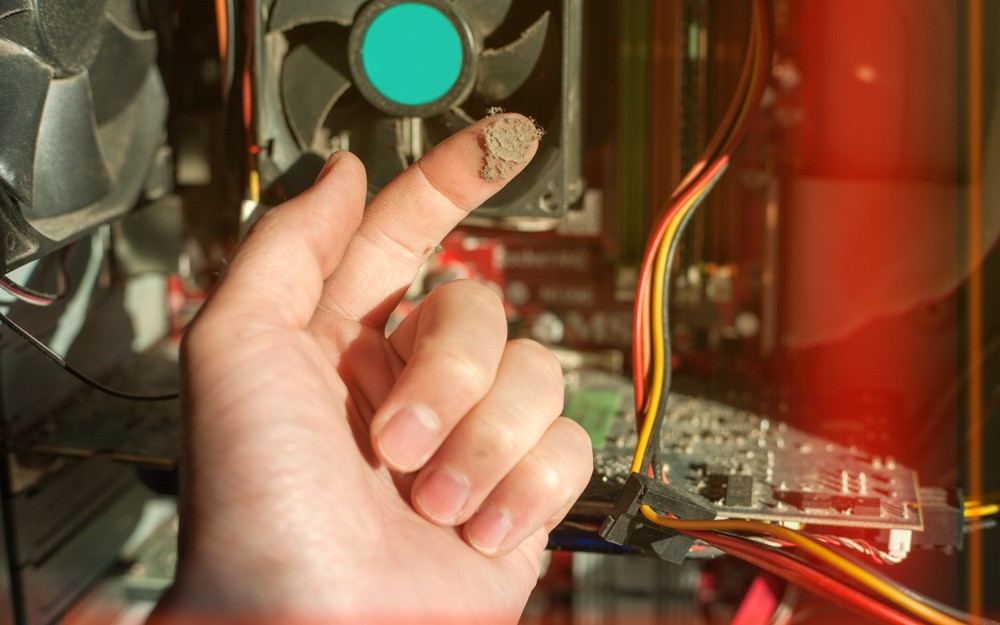
A computer needs to stay clean and cool – everyone knows that. Many people try to take the necessary basic measures to keep their computers clean. However, dust and dirt will eventually collect inside the computer, and it can cause a wide range of complications if left to linger. It calls for a thorough cleaning. 

Cleaning a computer is a delicate task. However, you don’t need any special skills to do it. So, unplug your computer, set it on a working desk, and following this guide to the letter. 

How To Clean a Gaming Computer

Take these simple steps to clean your gaming PC and keep it in good shape!

dusty gaming pc

Step 1: Clean the Computer Case 

The computer case is relatively easy to clean. You will need a screwdriver, soft cloth, soft brush, and compressed air. 

Unscrew the case using the screwdriver – please note that some computer cases can be removed by hand. You will see dust all over the inside of the case, and you will notice it concentrated at the top and bottom.

Use the soft cloth to wipe off the dust. You will also need the sift brush to dislodge dust in the hard-to-reach-places and the compressed air to blow it away. 

Check to see whether the fans are mounted to the case. In this case, you should use the screwdriver to remove the fans. The brush and compressed air will come in handy cleaning them. You can also wipe the blade using the cloth dipped in alcohol, but be gentle.  

Step 2: Clean the CPU 

The CPU is delicate, so be gentle how you handle it. You will not be cleaning the CPU itself – instead, you will be cleaning the cooler and socket attached to it. 

Start by checking the manufacturer’s guide to see your particular CPU’s setup. Reference the manufacturer’s guide to disconnect the cooler from the motherboard. Hold the fan firmly but gently and use the brush to clean off the dust.

Next, use your fingers to hold the fan’s blade while you blow the compressed air over it to get rid of the remaining dust – the motor shouldn’t rotate from the compressed air as this may damage the bearing.

Finally, use the cloth dipped in alcohol to wipe the exposed surfaces clean. 

P.S. You don’t need to remove the CPU to clean the cooler and fan. It is best to avoid contact with the CPU as much as possible. 

Step 3: Clean the Graphics Card

The graphics card is delicate but easy to clean. You don’t even have to remove it from its socket, but experts recommend doing so. 

Use the screwdriver to remove the screws holding the graphics card in place. Check for any other safety measures and pull the card out – please note that you may need to apply some force, depending on the make of your PC. 

Start by cleaning the card’s back-plate using a soft brush – be extra-gentle if the card doesn’t have a back-plate covering the circuit system. Next, hold the fan gently and use the compressed air to blow off the dust. Finally, dip the soft cloth in alcohol and use it to wipe the fan’s blades clean. 

Step 4: Clean the Power Supply Unit

The PSU is relatively easy to clean, but it is important to exercise caution not to damage any of the wires and cables. You don’t need open the PSU to clean it, so leave it closed to avoid any complications afterwards. You do, however, need to remove it from its socket. 

The first step is discontenting all power connectors to and from other components. Use the screwdriver to get the CPU out of the case and be sure to check for any fail-safe safety pins.

Next, use the screwdriver to hold the blades in place as you blow compressed air through the fans to get rid of dust.

Finally, detangle the cables and screw the PSU back into its socket.  

Step 5: Clean the Motherboard 

The motherboard is one of the most delicate and fragile components of your computer. Fortunately, dust doesn’t collect on most motherboards because they are usually placed in a vertical position. However, it is still recommendable to get rid of the thin layers of dust that may have built up, as they will cause overheating if left to accumulate. 

All you need to clean the motherboard is a fine brush and steady hands. Use the brush to brush away dust particles settles on the motherboard’s surface.

Take your time with the ports to get rid of any dirt particles lodged therein. You may also need to blow over the motherboard’s surface using compressed air, but this is not recommendable – adjust the air pressure to gentle if you must use it! 

Step 6: Clean the Peripherals 

clean keyboard

Cleaning the peripherals (keyboard, mouse, monitor, speakers, and any other external devices) should be a walk in the park, now that the delicate components are out of the way. Let your eyes guide you, and don’t leave any stain or speck of dust unattended. 

You will need all your tools for this job. The brush will come in handy for dislodging dirt particles and scrubbing off hard-to-remove stains, while the compressed air will blow off the smallest dust particle. Finally, the cloth and alcohol swabs will leave the surfaces clean and shiny! 

Step 7: Put Everything Back Into Place

You are not out of the woods yet – you still have to put your PC back together and get it running as good as new! This should be relatively simple – just follow the guide you used to unplug the components, but do it in reverse this time around. 

Keep It Clean!

You should keep your computer clean if you want your gaming PC to last! It is recommendable to have a regular cleaning schedule – however, don’t hesitate to bring out the cleaning kit any time you notice dust accumulating.

Most importantly, keep your PC in a safe, clean, and cool environment to avoid repeating this more often! Finally, don’t be afraid to consult a professional if you are concerned about breaking your PC.

The post How to Clean Your Gaming PC – A Simplified Guide appeared first on iDapt Web.
Tuesday, October 27, 2020

How to Gameshare on Xbox One and PlayStation 4

The gaming industry has witnessed a lot of advances over the recent past, and the Gameshare feature is still making waves. The title is self-explanatory: essentially, it is a feature that allows you to network with other players and share your games.

Players can use this feature to open up their games to chosen friends, thereby giving everyone access to a larger library of games in various genres! 

The Gameshare feature is currently available for two consoles: Xbox One and PlayStation 4.

Unfortunately, many players don’t know how to Gameshare. This article will clear all that up! 

How to Gameshare on Xbox One 

xbox one

Sharing your games on Xbox One is simple. There is one base requirement: you and the person you intend to share with must have an Xbox One console with the systems and accounts fully set up, as well as any necessary Xbox One accessories. The accounts are especially important, as they will function as they key to the Gameshare portal. 

Here is a step-by-step process on how to Gameshare once all this is set up: 

1. Share Your Account Details

As mentioned, the systems and accounts function as keys to the Gameshare portal. You will need your partner’s account information to access their games library, and they will need yours, too.

As such, begin by sharing your account details with the person you wish to share your gaming library with. 

The account details required will include the primary email to your Xbox One, as well as the primary password. It is also worth noting that your and your partner’s passwords should match for a flawless connection.

So, remember: transparency and trust are important for a mutually beneficial partnership. Don’t give away your account info to someone you don’t trust!

2. Add Your Partner’s Xbox Account Details

The next step entails using your partner’s account details to connect to their gaming library, and them to yours. This is fairly simple. 

Start by selecting the main icon position on the top-left corner of your screen. The icon will open a drop-down menu with several options, including one labeled Add New. This option allows you to add your partner’s account to your console. Select this option and proceed to the next step. 

Next, make your partner’s account your home Xbox to access their library. Do this by navigating to the Settings menu and on to the Personalize tab. Click on this tab and input your partner’s account details as your own.

Finalize the registration, and don’t worry about the alert notifying you that anyone can access your gaming library – this is what you are going for, after all. 

3. Enjoy!

That’s it! Gamesharing on Xbox1 is as easy as that. Finalizing the application process using your partner’s account details, as explained in step two, will give you access to their gaming library.

As such, navigate to the My Games & Apps option, click on it, and then navigate to the Ready to Install option and click on that too. You will then see all the games available, including those already in your account and those in your partner’s account. 

P.S. This process should be repeated twice to finalize the connection: once on your Xbox One account and again on your partner’s Xbox One account. It is also worth noting that activating this feature allows you to share one Xbox Live Gold account


How to Gameshare on PlayStation 4

play station

The gamesharing process on PS4 works a lot like the process on Xbox One. One similarity is that you and the people you intend to share your gaming library with should have active systems and accounts on PS4 consoles. Again, the account details will function as keys to your partner’s gaming library. 

Follow the following step-by-step process once the accounts are systems are set up:

1. Share Account Details 

Start by sharing account details, including the primary email address and passwords. Again, transparency is important for a flawless connection. 

2. Activate Accounts 

The next step involves unlocking your partner’s gaming library using their account information. This entails using your partner’s login information on your PS4 console. Next, navigate to the Settings menu and find the Account Management option. 

There are a lot of sensitive settings under this option, so be careful where you click. Find the option labeled Activate as Your Primary PS4 and click on that. This will essentially make your friend’s PS4 account one of yours, hence giving you unlimited access to their gaming library. 

P.S. You may need to deactivate your primary PS4 account for your partner’s system to come online. This is a popular recommendation if the networking process runs into complications – on that note, don’t forget to be transparent in sharing your personal account info to avoid complications. 

3. Enjoy!

That’s all! You can now access your partner’s gaming library and enjoy! However, you will be required to download the titles in your partner’s gaming library to your console’s hard disk to actually play them.

However, you will be saved the trouble of having to reconnect to your PS4 account, but you will have to undo and redo the whole process if you ever need to make significant changes in the future. 

Precautions You Should Consider

One of the notable aspects of game sharing is that you and your partners have to share your account details. This is necessary, but it comes with an underlying risk that your partner may use your account information without your consent. For example, your partner may use your primary account information to buy new games on their account!

As such, it is advisable to be careful who you connect with on Xbox One or PS4. You may also set up a separate primary account exclusively for use with the Gameshare feature

Final Thoughts

You don’t have to buy the whole PlayStation 4 or Xbox One library to explore more of what these gaming legends have to offer. The revolutionary Gameshare feature allows you to explore as many gaming titles as your friends have!

This feature currently works only for Xbox One and PlayStation 4, but it will soon become a standard on more gaming consoles. Set your console of choice up with your best gaming TV and get started!

The post How to Gameshare on Xbox One and PlayStation 4 appeared first on iDapt Web.

Tuesday, October 20, 2020

Do Smart Devices Slow Down WiFi?

Smart devices are taking over the world, so to speak. However, their impressive capabilities are somewhat limited when they lack a reliable internet connection.

While there seems to be active Wi-Fi signals virtually everywhere nowadays, there is credible concern that the devices that need this connection the most – the subject of our discussion – may be crippling Wi-Fi speeds. Do smart devices slow down WiFi in your smart home? Learn how to combat a slow connection. 

Can Smart Home Devices Slow Down Internet Speed?

Smart devices do indeed slow down WiFi speeds. However, the science behind it is deeper than that, albeit not complicated. Here is everything you need to know about how smart devices slow down WiFi speeds – and expert tips on how to remedy this. 

These factors influence if smart devices will slow down your WiFi.

Bandwidth

Smart devices use your WiFi’s bandwidth to connect to the internet. The catch is that bandwidth is limited, which is why it tends to get slow at times – especially when there are many smart devices connected to the network. 

Think of bandwidth as a highway. Cars tend to move fast when the highway is congested, but they slow down when the traffic is high. This is the same case with Wi-Fi routers and the connected devices. 

Essentially, the “WiFi highway” features as many lanes as the router’s speeds, measured in megabytes per second (mbps). So, suppose that you have a router with a speed of 1mbps and another with 5mbps.

Now, suppose that each router was required to support five smart devices. The former would take longer to deliver the required bandwidth, just like a one-lane highway with too many cars. However, the latter would comfortably handle the traffic, as it has more bandwidth to go around for all five devices. 

Number of Devices

The analogy of a highway and cars all comes down to numbers. There are two aspects to this concept: the number of devices connected to the WiFi network, and the size of bandwidth that each of these devices needs. 

The basic rule of thumb is that connecting many devices to a WiFi network overwhelms it, consequently weighing it down. This is the main explanation behind the many cases of slow network speeds in smart homes, where virtually every device and appliance is smart and connected to the Internet of Things

However, what really matters is the bandwidth requirements of the smart devices connected to the WiFi network.  It is possible to connect hundreds of smart devices and appliances to a network and not register dips in internet speeds – but only if these devices have minimal bandwidth requirements.

On the other hand, you can have only one device with a high bandwidth requirement and see your router struggle to keep up. 

How To Optimize WiFi for Smart Homes

Technology is an integral part of society, and smart devices are the latest portals to this technology. For example, the concept of a smart home has grown wildly popular, and the average smart home now has dozens of smart devices and appliances connected to the internet. 

It would be inconvenient to limit the number of devices connected to your WiFi network because of the resulting lag in speed, especially considering that there are several effective remedies. Consider the following expert tips:

Invest in Quality 

Routers come in different brands and varying qualities and specifications. The most important feature in a router is its speed, which is measured in megabytes per second. Some routers have speeds as low as 1mbps, while others push the limits with speeds much higher than this with speeds above 100mbps. 

A low-speed router will struggle to host many smart devices, as explained earlier in the analogy. Invest in a high-speed router capable of handling as many devices as you have.

A quality router will also boost your internet connection’s security, consequently saving you a lot of trouble in cybersecurity concerns.  

Placement & Positioning Matter 

Have you noticed that the WiFi signal is stronger in some parts of the house than it is in others? You have probably also noticed that the signal is especially strong when you are close to the router. This is because the router’s positioning matters in relation to the connected smart devices’ positioning. 

You may think of WiFi signals like sound. Sound gets louder and more intense as you get closer to the source, and it gets less intense as you move away.

The same happens with WiFi signals, and they especially become weak when blocked by walls and other objects. As such, it is important to pick a strategic position to place the router. 

wireless router for home wifi

Ideally, the router should be placed at an elevated position and away from any direct barriers. The best router placement should be such that all smart devices are within range of its coverage – ideally, the router should be strategically positioned to serve the most important (and high-speed) smart devices and appliances. 

Know Your Smart Devices’ Requirements

Some smart devices consume kilobytes per second, while others take up as much as 5mbps, as mentioned earlier. It helps to know the exact bandwidth requirements of the different smart devices connected to the router, as you can then regulate bandwidth usage. 

For example, wireless security cameras and smart doors tend to consume the highest rates of bandwidth in a smart home. These also happen to be some of the most important devices in a smart home, which is why you should consider getting a separate dedicated router just for their usage.

Additionally, some devices consume too much bandwidth unnecessarily – in this case, you should consider reconfiguring these devices’ settings to minimize bandwidth usage. 

P.S. You will also be interested to learn that the microwave, while not smart, sends the WiFi signal scrambling every time it is turned on!

Final Thoughts

WiFi connections to the internet have become lifelines for the numerous smart devices in use every day. This is why weak, slow, and unstable WiFi connections are so frustrating. However, you can do something about it now that you know what causes these complications. These expert tips are a good starting point.

The post Do Smart Devices Slow Down WiFi? appeared first on iDapt Web.
Tuesday, October 13, 2020

Biggest Pro Gaming Tournaments: 6 Best Tournaments for Gamers

Gaming has come a long way, from a casual pastime to a fully-fledged professional occupation. The pro gaming industry has made headlines severally for the money involved. Some pro gamers make six-figure salaries, so it is no wonder that the industry is creating its own tournaments – just like conventional sports. 

The gaming industry hosts thousands of pro gaming tournaments physically in gaming arenas and digitally on platforms such as Twitch. However, only a handful of these tournaments make headlines. 

Here is an overview of the biggest pro gaming tournaments. 

Best Professional Gaming Tournaments:

  1. eSports World Convention
  2. FIFA e-World Cup
  3. Call of Duty Championships 
  4. Fortnite World Cup
  5. Evolution Championship Series 
  6. Counter-Strike: Global Offensive Major Championships


eSports World Convention 

The eSports World Convention (ESWC) is one of the earliest pro gaming tournaments. The ESWC came about as an off-shoot of multiple gaming events and parties in Paris and across Europe. These small factions came together to form the first ESWC tournament in 2003, and it has been held every year since. 

The eSports World Convention started off mostly focusing on first-person shooter and action genre games. However, it has expanded and diversified over the years to include games in other genres.

In fact, some of the other notable tournaments, including many based on Call of Duty and Fortnite, were inspired by the ESWC.


FIFA eWorld Cup 

Soccer is undoubtedly one of the most popular e-sports – so popular that it has given rise to entire virtual sporting markets, including the incredibly popular fantasy soccer betting segment. Unsurprisingly, the FIFA eWorld Cup is one of the world’s biggest pro gaming tournaments.

This tournament is so big that Twitch, YouTube, and other streaming platforms are insufficient. To this end, the tournament is broadcast live on TV in many countries to reach millions of fans worldwide. 

The first FIFA eWorld Cup debuted in 2004. The tournaments have attracted huge audiences worldwide ever since. It is one of the most dynamic virtual pro gaming tournaments, as there is always something new each year.

Additionally, FIFA video games are regularly updated to reflect things on the field, and, as soccer enthusiasts know, there is always something interesting happening!


Call of Duty Championships 

Call of Duty may not be the ultimate first-person shooter game, but it holds a dear place in the hearts of pro gamers. To this end, three of the biggest pro gaming tournaments are based entirely on this game: Call of Duty Pro League, Call of Duty World League, and, ultimately, Call of Duty Championship.

It is a hierarchical affair, whereby participants have to emerge victorious in the CoD Pro and CoD World Leagues to qualify for the CoD Championship Tournament. 

This tournament has many ways to keep things interesting, besides the thrill associated with Call of Duty games. For instance, every tournament is based on the game’s latest version – for example, the 2018 tournament was based on Call of Duty: WWII, while the 2019 tournament was based on Call of Duty: Black Ops 4.  

Additionally, the tournament creates segments inclusive of all qualifying players. For example, there are segments for pros and amateurs. The prizes also vary and include six-figure cash prizes and the latest gaming equipment. 


Fortnite World Cup 

Fortnite is one of the most popular (some people would also argue addictive) games at the moment. To this end, it is understandable why news of Google banning the game from the Android platform and PlayStore made headlines for the fury it created. It is also understandable why this game is at the center of one of pro gaming’s biggest tournaments: Fortnite World Cup

Fortnite has climbed up the ladder incredibly fast, considering that the game first debuted in 2017. The main tournament brings together thousands of participants from all over the world, and millions more tuned in via the various live streaming platforms. 

One of the most attractive things about Fortnite World Cup is its huge prizes. The main tournament has a cash prize of $30 million, while the smaller weekly tournaments pay $1 million, which is significant compared to most other gaming tournaments. 


Evolution Championship Series 

For a tournament that focuses solely on action-themed fighting games, the Evolution Championship Series is one of the most welcoming tournaments. The first tournament debuted in 2002, which makes this one of the longest-running tournaments – however, this usually goes unappreciated as the first tournaments were small and mostly localized to Japan.

Many aspects of this tournament are extraordinary compared to other tournaments. However, this may be partly explained by the tournament’s origins: Japan, the birthplace of many revolutionary video games, and a place of unusual concepts and mannerisms. 

The Evolution Championship Series, popularly dubbed EVO, takes place every summer in Las Vegas. It brings together thousands of attendants at the designated venues, and millions more join in virtually.  

As mentioned, EVO focuses entirely on action-themed fighting games. Popular options include Mortal Kombat, Street Fighter, Super Mash Bros, Tekken, and virtually any other popular fighting game. The tournament lasts for three days, which affords participants plenty of time to duel on multiple games. 

One of the best things about the Evolution Champion Series is that anyone can participate, including amateurs. However, it is advisable to polish up your skills when tossing your hat in the ring to avoid disappointment – don’t forget that it is an event that brings together the best pro gamers. 


Counter-Strike: Global Offensive Major Championships

It is amazing how far Counter-Strike has come. However, regardless of having started off as a basic first-shooter game with pitiful graphics, this game has inspired one of the biggest pro gaming tournaments – so big that it takes place twice yearly to accommodate the numerous participants and fans. This tournament is so popular that it has simply been dubbed “Majors” for its top position in the industry. 


Final Word

The pro gaming industry is worth billions, and its value is increasing rapidly as it gains millions of fans and audiences worldwide. It is one of the most diverse and robust gaming segments, with millions of tournaments based on as many video games as there are taking place on hundreds of streaming platforms.

However, these six tournaments are among the best, biggest, and most exciting – and not to be missed by any pro gamer worthy of the name. Some of the biggest pro gaming tournaments were postponed in 2020 due to COVID-19, so stay up to date on rescheduled events so that you can tune in! 

The post Biggest Pro Gaming Tournaments: 6 Best Tournaments for Gamers appeared first on iDapt Web.

Tuesday, October 6, 2020

What Do I Need to Build a Gaming PC? Gaming PC Parts Explained

Gaming PCs are magnificent. All that power under such a sleek hood feels intoxicating, right? It is almost crazy to think that you could build such an impressive machine yourself. However, it is not difficult when you have the proper tools and PC components. In fact, it is rather enjoyable. 

You may find yourself asking “What do I need to build a gaming PC?” Building your very own gaming PC starts with getting the right parts. Here is a list of everything you will need to build a powerful gaming PC:

Gaming PC Parts:

  1. Central Processing Unit
  2. Motherboard
  3. Graphics Processing Unit
  4. Random Access Memory
  5. Storage
  6. Power Supply Unit
  7. Casing
  8. Fan or Cooler
  9. Monitor
  10. Accessories


Central Processing Unit

The CPU functions as the PC’s brain, which makes it the most important component in your toolbox. The CPU is responsible for executing commands, and how well it executes commands depends on how powerful it is. If you’re building a gaming PC, the CPU is a good place to start.

Ideally, it’s prudent to go for the latest CPU models as they will deliver the best performance. Fortunately, the market is full of CPUs with impressive specs at varying prices. The best options include Intel and AMD. Intel is a popular choice, and their best CPU models for gaming include 8th and 9th generation Core i5 and i7 processors. AMD’s best processors for gaming are Threadripper and Ryzen.   


Motherboard 

If the processor is the CPU’s brain, then the motherboard is the backbone that connects all other components. It facilitates communication between the different CPU components. 

Ideally, it is prudent to get the best motherboard that your money can afford. Focus on features such as connectivity, lighting, and CPU overclocking when choosing the ideal motherboard. However, be forewarned that your options may be limited, as some motherboards are incompatible with some CPU models. 


Graphics Processing Unit

4k graphics card

A gaming PC is distinguished by its ability to process the complex calculations involved in PC games. This is because they feature a graphics processing unit (GPU), also known as a video card. 

Some CPU models feature integrated graphics cards. However, these cards are usually average in performance, which makes it necessary to get a secondary graphics card. You have plenty of options at your disposal, but experts recommend going for the best-quality models. In that case, your best options include AMD’s Radeon RX Vega and Nvidia’s RTX 2080 Ti.

Video cards are vital components for gaming PCs, which makes it necessary to emphasize quality and focus on the card’s frame and resolution capabilities. It is also important to note that video cards are quite expensive.


Random Access Memory (RAM)

Gaming creates a lot of short-term memory that your computer has to access continuously for a smooth experience. The RAM is responsible for storing temporary memory. Experts recommend getting a large-capacity RAM, considering that you will want your PC to flawlessly handle the heaviest games – experts recommend at least 32GB for longevity.  


Storage 

You will need somewhere to store everything you need to run your gaming PC, ranging from the Operating System to your games’ permanent data. This calls for a storage disk, such as a Hard Disk Drive (HDD) or Solid-State Drive (SSD). SSD disks are preferable as they are faster and quieter compared to HHD disks, and speed is critical in gaming. 

It is advisable to go for a large capacity storage drive, preferably at least one Terabyte – or more – to store everything you need for an enjoyable gaming experience. You can also complement your PC’s internal storage with an external hard disk and USB storage drives.


Power Supply Unit 

The power supply unit is often overlooked because it only serves one purpose that does not directly affect the gaming experience. However, the PSU is an important component as it supplies the power your gaming PC needs to operate. It is also important to ensure that the power supply unit matches your PC’s wattage requirements – get a heavy-duty PSU if your PC is running on high-end video cards, SSDs, and other components. 


Case 

tempered glass pc case

Your gaming PC’s case is the first thing that people will note. In fact, gaming PCs are distinguished by their flashy, compact cases

Cases come in different shapes, sizes, and designs. Transparent and translucent cases are especially popular because they offer a glimpse of your gaming PC’s internal handy work. Experts also recommend getting a case that features an in-built cooling system, including fans and cooling loops. It’s also advisable to get a big case if you plan to make customizations in the future.   


Fan or Liquid CPU Cooler

cpu cooler fan

Gaming causes PCs to overheat, regardless of how powerful the different components are. Excessive heating is dangerous to the PC’s gaming components, and it can reduce their durability or cause direct complications, such as shorts to the motherboard. As such, it is important to have a reliable cooling solution. 

You have two cooling options: a fan or a liquid CPU cooler. A powerful, high-speed fan will do the trick if your PC doesn’t handle excessively heavy games. Alternatively, you can get a liquid cooler if your CPU is overclocked. You can also use a thermal paste to draw heat away from the CPU. 


Monitor 

best budget 4k monitor

A monitor functions as a portal to your game’s virtual world, as it is where all the visual interactions take place. To this end, the quality of your PC’s monitor can make or break your gaming experience. To this end, it is advisable to get a monitor with high-quality resolution specs. 

Experts recommend a 4K monitor with a refresh rate of at least 144Hz for the best video quality. It is also important to note that some monitors support certain graphics cards, so do enough research into your monitor’s compatibility with these and other components. 


Accessories 

best gaming keyboard and mouse combo

Finally, you will need supporting accessories, including the basics: mouse, keyboard, RGB lighting, and speakers. This shouldn’t be a problem, as these accessories are plenty and affordable. However, be sure to check that your chosen accessories are compatible with your PC’s components. 


Final Word

Building a gaming PC is not difficult once you have all the necessary components. These components are sufficient to build an enviable gaming PC. However, don’t skimp on quality, and don’t be afraid to add complementary components for the ultimate gaming experience.

The post What Do I Need to Build a Gaming PC? Gaming PC Parts Explained appeared first on iDapt Web.

Tuesday, September 29, 2020

What is a Smart Home Hub and Do You Need One?

A smart home is only as good as the level of automation achieved. Think about it: is your smart home truly smart if you need a bunch of devices to control the different appliances? Unfortunately, the Internet of Things scene is currently in disarray because the different players have not yet streamlined communications. This is where a smart home hub comes in. 

What is a Smart Home Hub? 

A smart home hub is a central device that connects all of your smart devices. To better understand what a smart home hub is, it helps to understand the problem that these gadgets solve. 

The Problem with Smart Devices 

There are many different brands of smart home appliances and solutions. Additionally, there are different communication protocols for these appliances and solutions. Some of the most popular communication protocols are Bluetooth, WiFi, Z-Wave, and Zigbee. 

The diversity in options is good, but it also creates a communication barrier. For example, one appliance made by Samsung may be designed to communicate via Z-Wave, while another appliance by Phillips communicates via WiFi. The lack of compatibility in communications has two negative implications: either some of your commands and controls will be ineffective, or you will need to get as many control hubs as you have different appliances. The alternative is a smart home hub. 

The Solution: Smart Home Hubs

A smart home hub is a mini-computer that streamlines communications between different smart home appliances and communication protocols. It essentially functions as the smart home’s central nervous system, whereby the homeowner can control every feature of their smart home from one platform facilitated by their smart home hub. 

smart home hub

How Does a Smart Home Hub Work? 

As mentioned, a smart home hub reconciles the differences in your smart home appliances’ communications protocols. It is a relay that receives, decodes, and optimizes commands in a way that they are understandable by different appliances. 

For example, consider a smart home where the owner has pre-set the smart lights and TV to turn on when the sensors sense them approaching the door. However, the sensors and TV may be manufactured by a brand that work with Z-Wave, while the lights are only compatible with Bluetooth technology. The sensors will relay these pre-set commands to the smart home hub, which will then interpret them and relay them to the lights and TV. 

A smart home hub’s versatility is facilitated through one central smart home application. The application essentially functions as a universal remote control for all smart home appliances. 

Ideally, a smart home hub’s app should integrate with all smart home appliances and communication systems in your home. However, there are different smart home hub solutions, and their features and capabilities differ.  

Smart Home Hub Alternatives

There is an argument that smart home hubs are not entirely necessary. This argument is partly credible because it depends on a variety of factors, including the chosen alternative solution. 

There are several alternatives to a smart home hub, including Google Assistant, Amazon Alexa, Apple HomeKit, and IFTTT. These solutions are designed to streamline communications between different appliances, just like a smart home hub does. 

However, these alternative solutions rely on two key components to do this: a gateway/bridge in the individual smart home components, and an internet connection to the cloud. The bridge enables these individual appliances to connect to the home’s WiFi router, while the cloud connection facilitates communication between these appliances and your smartphone (control device). 

The cloud connection also eliminates the need for an interpreter, as well as the need for intercommunication between different appliances. Additionally, the bridges/gateways enable appliances to connect to hub-free cloud platforms. This entirely eliminates the need for a smart home hub. 

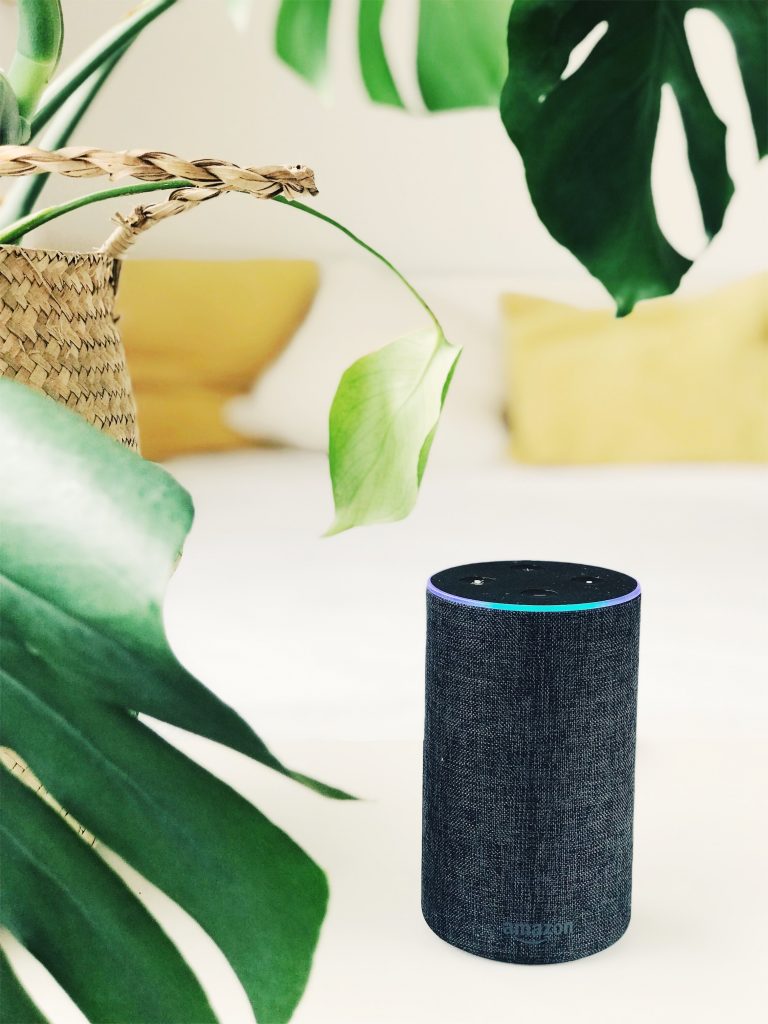
Some of these alternative solutions – Apple HomeKit, Google Assistant, and Amazon Alexa – also offer one added convenience: voice command control. These solutions use their smart speakers and voice assistant technologies – Siri (Apple), Echo (Amazon), and Google Home – to issue commands via speech. Many homeowners prefer this because it is easier and quicker than giving commands via the phone. These smart speakers may act as your smart home hub.

alexa

However, these alternative solutions have their shortcomings, too. Their biggest shortcoming is the lack of reliability. It all has to do with the communication channels: WiFi vs. the alternatives (Z-Wave, Bluetooth, and Zigbee). 

The problem with a WiFi connection is that it is easily interrupted. WiFi radio waves share channels with many other radio waves, including your phone’s and microwave’s radio waves. WiFi connections are also relatively easy to infiltrate and interfere with, depending on your cybersecurity’s reliability – homeowners have also raised credible concerns about voice command solutions collecting private data without their knowledge or consent. As such, you cannot always rely on your smart home to run smoothly. 

Z-Wave, Bluetooth, and Zigbee connections are not as easily interruptible as WiFi connections. They run on different channels that have less radio wave traffic than the default WiFi channels – however, Bluetooth-based solutions may experience similar interruptions. As such, you can rely on them more often than not, compared to Wi-Fi connections.     

Verdict: Do You Really Need a Smart Home Hub?

So, do you need a smart home hub when your home’s WiFi router can get the job done? You may, depending on how reliable (or unreliable) your WiFi internet connection is.

It’s also important to take into consideration the extra requirements of a WiFi-based smart home solution. For starters, you have to make sure that each appliance in your home has an inbuilt bridge/gateway for the solution to work. Additionally, you have to implement an impenetrable cybersecurity solution to avoid potentially malicious external interference.

It is safe to say that a smart home hub is a better solution than the alternatives, considering the different solutions’ benefits and shortcomings. Besides, some of the leading smart home hubs feature substantially more capabilities than WiFi-based solutions. For example, many modern hubs support voice commands, just like Google Home and Amazon Alexa. Finally, the reliability assured by a hub is more than worth it when you consider how irritating connectivity issues can be. 

The post What is a Smart Home Hub and Do You Need One? appeared first on iDapt Web.